
Finding the perfect fit for your gear can transform your entire experience, whether you’re hitting the gym, going for a run, or tackling outdoor adventures. The right equipment isn’t just about looking good—it’s about maximizing comfort and performance.
Many athletes and fitness enthusiasts waste precious time and money on gear that doesn’t suit their needs. The frustration of dealing with ill-fitting shoes, uncomfortable clothing, or improperly adjusted equipment can derail your progress and enthusiasm. But what if you could master the perfect fit in just five minutes?
This comprehensive guide will walk you through quick, effective techniques to test your gear and ensure optimal comfort and performance. From footwear to technical apparel, from backpacks to fitness trackers, you’ll learn the insider secrets that professionals use to get their equipment just right. Let’s dive into the methods that will revolutionize how you approach your gear selection and adjustment process.
🎯 Why the Perfect Fit Matters More Than You Think
The difference between good and great performance often comes down to the smallest details. When your gear fits properly, your body can move naturally and efficiently. Poor fit leads to compensatory movements, which increase injury risk and decrease performance output.
Research shows that properly fitted athletic shoes can reduce injury rates by up to 39%. Similarly, well-fitted clothing reduces chafing and distraction, allowing you to focus entirely on your activity. The psychological boost of comfortable, confidence-inspiring gear shouldn’t be underestimated either—when you feel good, you perform better.
Time is valuable, and traditional fitting methods often require multiple trips to stores, lengthy trial periods, and guesswork. The five-minute testing approach streamlines this process while maintaining accuracy and effectiveness.
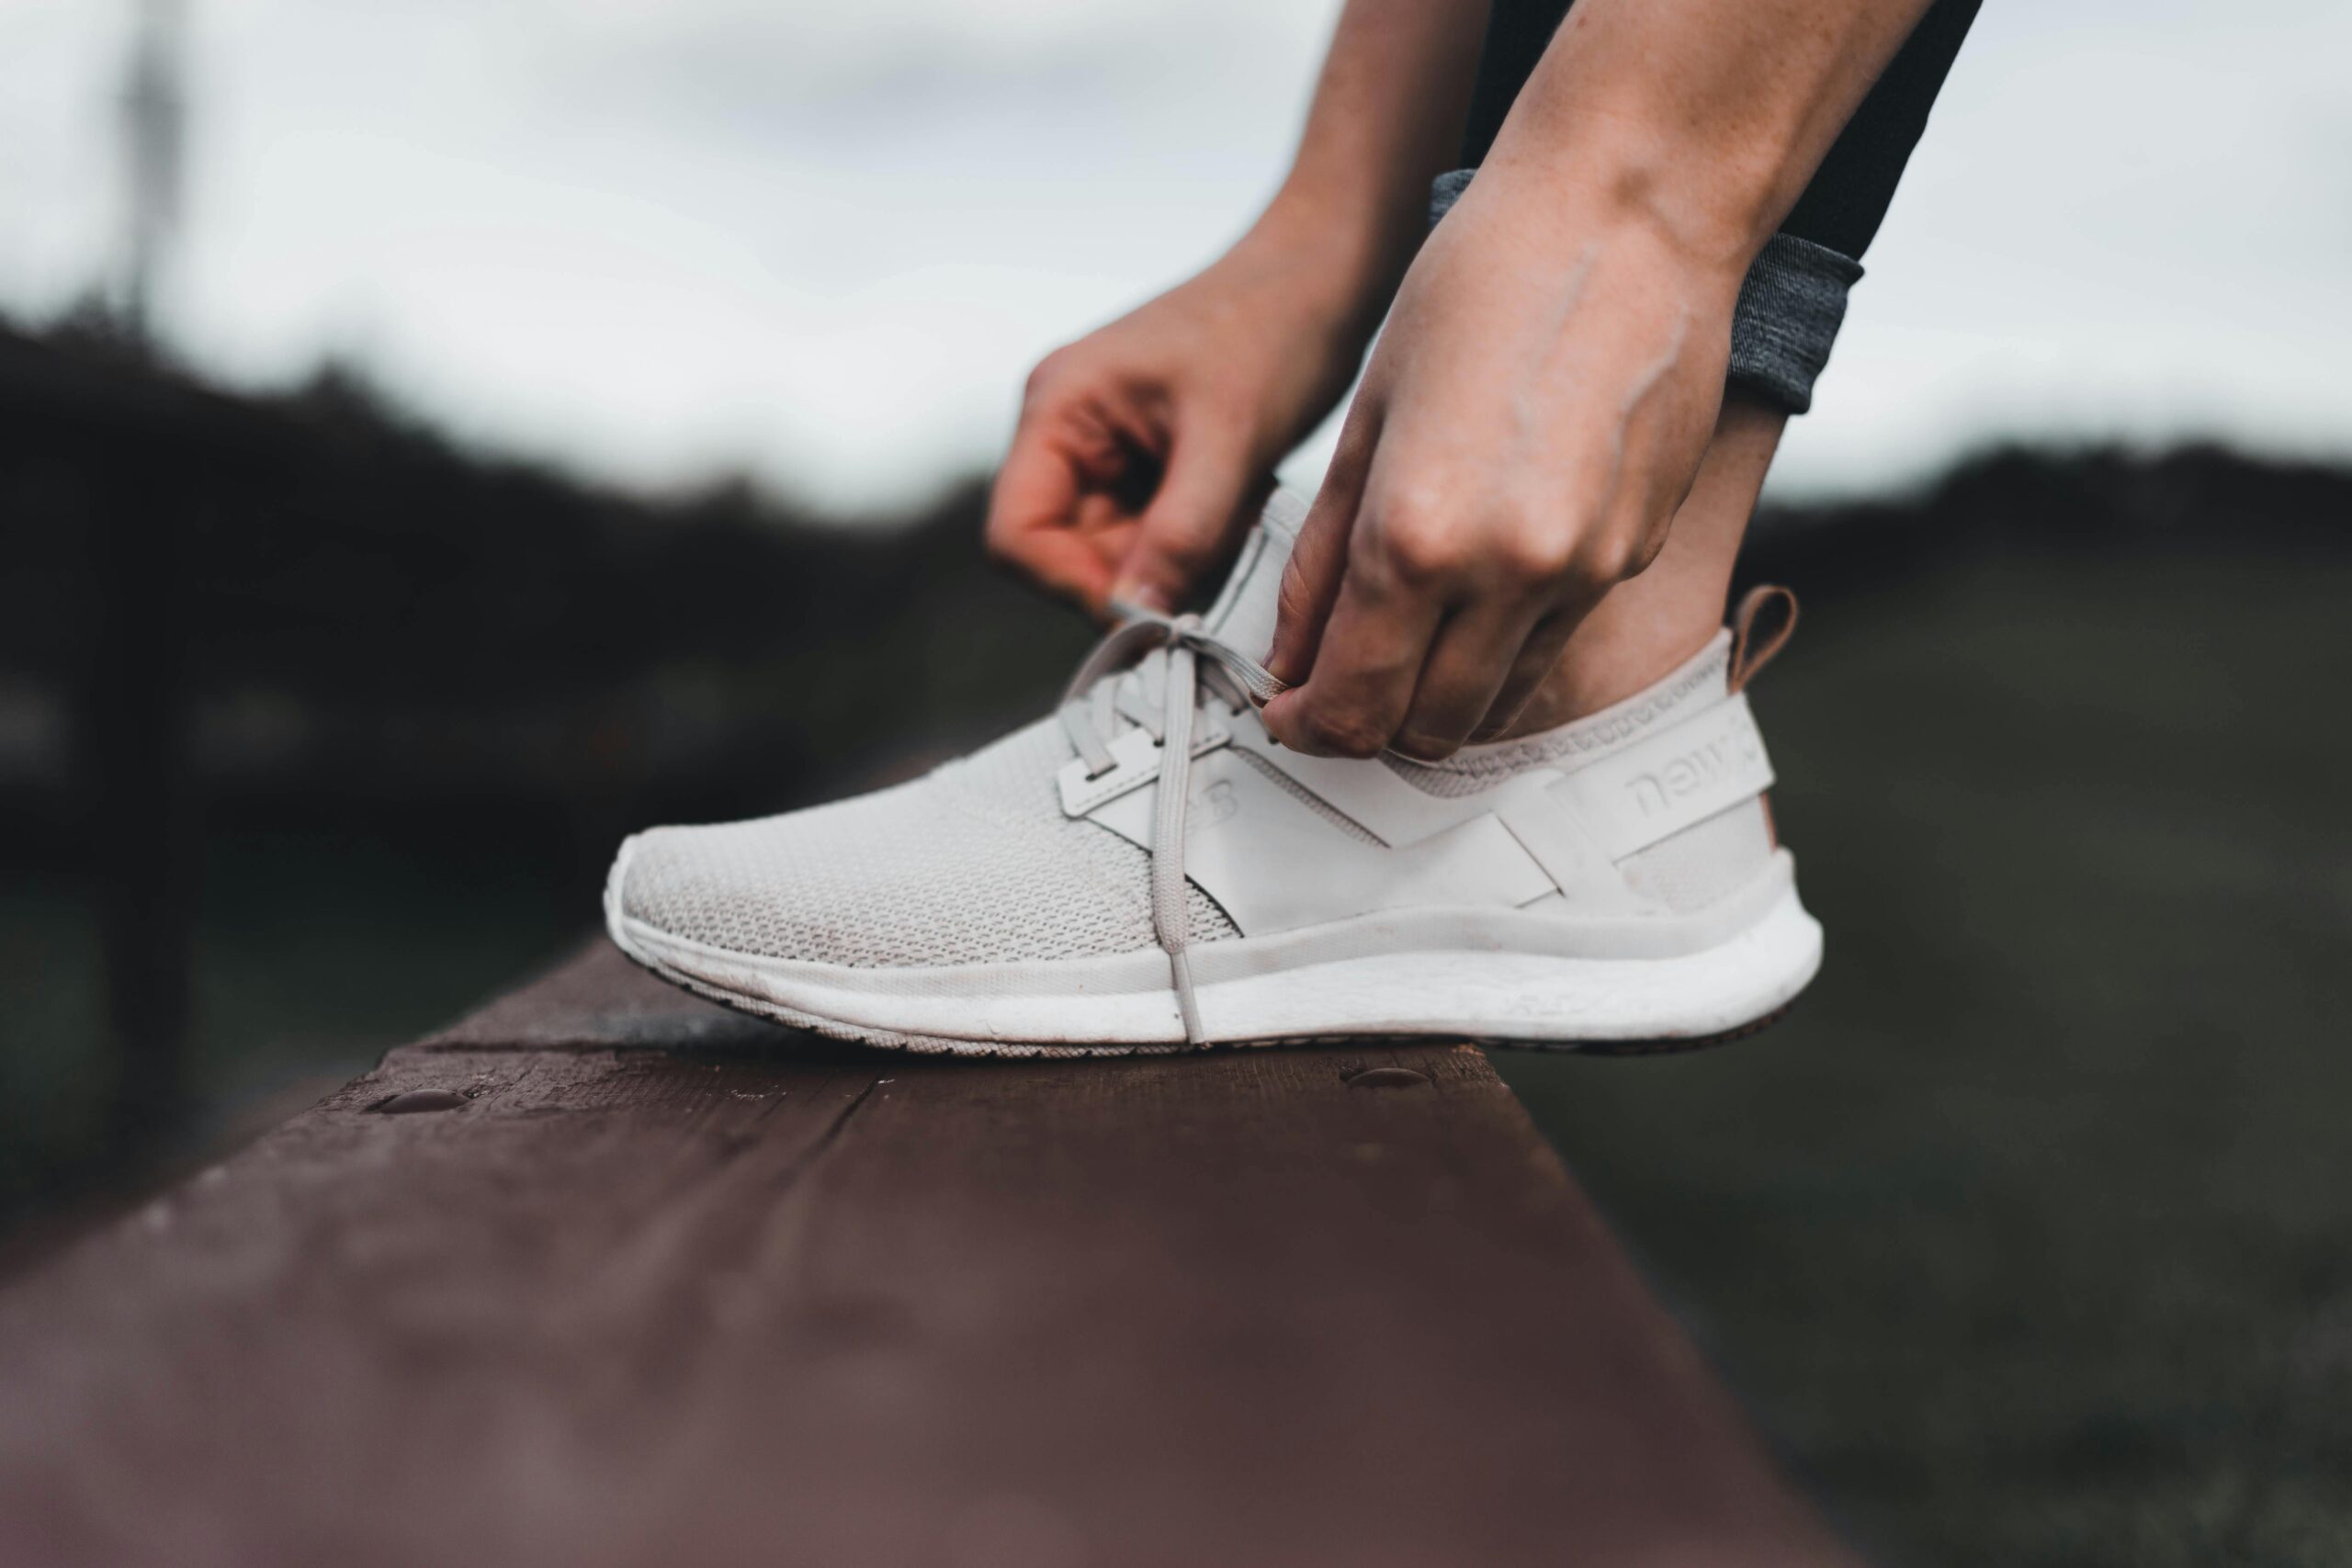
⚡ The 5-Minute Footwear Fit Test
Footwear represents the foundation of most athletic activities. Getting this right is non-negotiable for comfort and injury prevention. Here’s how to test shoes quickly and effectively.
The Thumb Test for Length
While standing in your shoes with your weight distributed evenly, press your thumb between your longest toe and the front of the shoe. You should have approximately a thumb’s width of space—about half an inch. This allows for foot expansion during activity and prevents black toenails and cramping.
Try this test at the end of the day when your feet are naturally swollen. If the shoes fit then, they’ll definitely work during intense activity when blood flow increases foot volume.
The Heel Lock Assessment
Walk briskly for 30 seconds and pay attention to heel movement. Your heel should stay locked in place without sliding up and down. Excessive heel slip causes blisters and reduces energy transfer, making every step less efficient.
If you notice slippage, try adjusting your lacing technique before abandoning the shoes. The runner’s loop or heel lock lacing method often solves minor slippage issues without requiring a different size.
The Flex Point Check
Hold the shoe and bend it gently. The flex point should align with where your foot naturally bends—at the ball of your foot. If the shoe bends elsewhere, it will fight against your natural movement pattern, causing fatigue and potential injury.
👕 Testing Technical Apparel in Minutes
Athletic clothing has evolved far beyond simple cotton t-shirts. Modern technical fabrics offer moisture-wicking, temperature regulation, and compression benefits—but only when they fit correctly.
The Raise and Reach Test
Put on your shirt or jacket and perform these movements: raise both arms overhead, reach across your body, twist your torso, and bend forward. The garment should move with you without riding up, binding, or restricting movement. Pay attention to seam placement—poorly positioned seams create friction points that become painful during extended activity.
For compression gear, you should feel firm but comfortable pressure. If you see skin bulging around edges or feel numbness, the compression is too tight. If the fabric wrinkles or sags, it’s too loose to provide benefits.
The Breathability Quick Check
Hold the fabric up to your mouth and breathe through it. Quality technical fabrics allow easy airflow while managing moisture. If breathing feels restricted, the material may not perform well during intense activity when cooling becomes critical.
🎒 Backpack and Bag Fitting Essentials
Whether you’re carrying gym gear, hiking supplies, or daily essentials, proper bag fit prevents back pain and improves posture. An improperly fitted backpack can cause lasting damage to your spine and shoulders.
The Hip Belt Priority
Most people think backpacks should hang from shoulders, but proper fitting backpacks transfer 80% of weight to your hips. The hip belt should rest on your hip bones (iliac crest), not your waist. Load the pack with typical weight and adjust until you feel the hips carrying the load.
Walk around for two minutes. If you feel pressure on your shoulders but lightness on your hips, readjust. Shoulder straps should stabilize the load, not carry it.
The Lean Forward Test
Bend forward at the waist while wearing your loaded pack. The bag should stay close to your body and move with you as a single unit. If it pulls away from your back or shifts significantly, the load lifters and stabilizer straps need adjustment.
📱 Using Technology to Perfect Your Fit
Modern technology offers incredible tools to help you achieve the perfect gear fit. Various apps use your smartphone camera and sensors to provide detailed measurements and fitting recommendations.
Several brands now offer AR (augmented reality) fitting apps that analyze your body dimensions through your phone camera. These apps can recommend sizes across different brands, accounting for the fact that sizing varies significantly between manufacturers.
Foot scanning apps help you find the perfect shoe size by creating a 3D model of your feet. These tools measure length, width, arch height, and volume—providing much more accurate information than traditional sizing methods.
⌚ Fitness Tracker and Smartwatch Positioning
Wearable technology only works when positioned correctly. Improper placement leads to inaccurate data, which defeats the entire purpose of tracking your metrics.
The Two-Finger Rule
Your fitness tracker or smartwatch should sit approximately two finger-widths above your wrist bone. This position allows the sensors to read your pulse accurately while remaining comfortable during movement. The band should be snug enough that the device doesn’t slide around but loose enough to slide slightly on your wrist.
During activity, you might need to tighten the band one notch. Heart rate sensors work best with firm contact, but circulation should never be restricted.
The Tap Test for Sensors
With your device in position, tap the area around the sensors. You should feel solid, consistent contact with your skin. Gaps allow light to interfere with optical sensors, causing readings to spike or drop unrealistically.
🏋️ Quick Fitting Guide for Specific Activities
Different activities demand different fitting priorities. What works for running won’t necessarily work for cycling, and gym gear differs from hiking equipment.
Running Gear Specifics
For running shoes, prioritize the heel lock and flex point tests. Your running stride generates significant force—poorly fitted shoes amplify problems exponentially. Test shoes by jogging in place for 30 seconds and performing several toe raises. You shouldn’t feel pressure points or sliding.
Running apparel should fit close but not tight. Loose fabric creates excess wind resistance and chafing. Look for flat seams and check that nothing rubs during arm swing motion.
Cycling Equipment Fit
Cycling shoes should fit snugly around the midfoot with minimal heel movement but comfortable toe room. Your foot swells less during cycling than running, so the thumb test can be reduced to a half-thumb width.
Cycling shorts require a close fit to prevent the chamois from shifting. Stand and perform several high knee lifts—the shorts should stay in place without riding up or down.
Gym and Cross-Training Considerations
Cross-training shoes need stability more than cushioning. Test lateral movement by shifting your weight side to side quickly. Your foot should feel locked in the shoe without sliding or rolling.
Gym apparel benefits from four-way stretch fabrics. Perform squats, lunges, and arm circles. The clothing should accommodate full range of motion without restriction or transparency issues.
🔍 Common Fitting Mistakes to Avoid
Even experienced athletes make fitting errors that compromise comfort and performance. Awareness of these common pitfalls helps you avoid them.
Buying shoes in the morning when feet are smallest leads to afternoon and evening discomfort. Always try footwear later in the day or after activity when your feet have expanded.
Ignoring your dominant side creates asymmetrical issues. Most people have one foot slightly larger or one shoulder lower. Always fit to your larger/more pronounced side to ensure comfort bilaterally.
Assuming brand loyalty guarantees fit is dangerous. Even your favorite brands change sizing, materials, and construction methods. Test every new item thoroughly regardless of previous positive experiences.
💡 Professional Fitting Tips and Tricks
Professional fitters employ several insider techniques that you can easily replicate at home during your five-minute testing process.
The Paper Test for Shoes
Place a thin piece of paper under your heel inside the shoe. If you can easily pull it out while standing, your heel isn’t secure enough. This simple test reveals subtle fitting issues that become major problems during activity.
The Video Analysis Method
Use your smartphone to record yourself wearing the gear while performing relevant movements. Watch the footage—you’ll notice fitting issues that aren’t apparent in the moment. Look for fabric bunching, shifting equipment, or compensatory movement patterns.
The Temperature Consideration
Test cold-weather gear in a warm room first. Your body heat will accumulate quickly, showing you how the gear breathes and manages moisture. Similarly, test warm-weather gear after light activity to simulate how it performs when you’re heated up.
🎪 Adjustments That Make the Difference
Sometimes perfect fit is just one small adjustment away. Before giving up on gear, try these quick modifications.
Lacing techniques dramatically affect shoe fit. Research different lacing patterns for wide feet, narrow heels, high arches, or toe pressure. A simple lacing change can transform an uncomfortable shoe into your favorite pair.
Adding or removing insoles adjusts volume and support characteristics. Over-the-counter insoles offer arch support variations and volume adjustments that can perfect an otherwise well-fitting shoe.
Strategic padding placement in bags and packs can eliminate hot spots and improve weight distribution. Foam padding or even a folded towel in the right location makes hours of difference during extended use.
✅ Your 5-Minute Fit Checklist
Here’s your quick reference guide to testing any piece of gear efficiently:
- Minute 1: Initial assessment—put on the gear and notice first impressions of pressure points, restriction, or looseness
- Minute 2: Perform activity-specific movements—running in place, arm circles, squats, or reaching motions
- Minute 3: Check all adjustment points—straps, laces, closures, and verify proper positioning
- Minute 4: Test under slight stress—increase movement intensity, add weight, or simulate activity conditions
- Minute 5: Final assessment—mentally scan your body for any discomfort or restriction, and make final micro-adjustments
🚀 Taking Your Fit to the Next Level
Once you’ve mastered basic fitting techniques, consider these advanced approaches for optimal gear performance.
Professional fitting services offer biomechanical analysis that reveals issues you might miss. Many specialty running stores provide complimentary gait analysis, while bike shops offer comprehensive fit sessions. These services identify subtle problems before they cause injury.
Keep a gear journal documenting what works and what doesn’t. Note brands, sizes, specific models, and any adjustments you made. This reference becomes invaluable when replacing worn gear or trying new items.
Replace gear proactively rather than reactively. Shoes lose cushioning and support long before they look worn out. Technical fabrics lose their moisture-wicking properties after extensive use. Set replacement schedules based on hours of use rather than appearance.
🌟 The Confidence of Perfect Fit
When your gear fits properly, you forget you’re wearing it. This is the ultimate goal—equipment that disappears from your awareness, allowing complete focus on your activity and performance.
The five-minute testing approach isn’t about rushing—it’s about efficiency and knowing exactly what to check. With practice, these tests become instinctive, and you’ll recognize good fit immediately.
Remember that fit changes over time as your body changes. Weight fluctuations, muscle development, posture improvements, and aging all affect how gear fits. Retest your equipment periodically, especially if you notice new discomfort or performance issues.
Investing five minutes in proper fit testing saves hours of discomfort, prevents injuries that sideline you for weeks, and maximizes the return on your gear investment. Whether you’re a weekend warrior or serious athlete, these techniques ensure your equipment enhances rather than hinders your performance.
The perfect fit isn’t about finding magical gear—it’s about understanding your body, knowing what to test, and making informed decisions quickly. Master these five-minute testing protocols, and you’ll never waste money on uncomfortable gear again. Your body will thank you with better performance, fewer injuries, and the confidence to push your limits knowing your equipment supports you perfectly.